
Medicine Cabinet Organization 101
- Holly Blakey

- Mar 25, 2020
- 4 min read
Updated: Mar 28, 2020

I originally posted this medicine cabinet makeover via Instagram Stories two weeks before LIFE AS WE KNOW IT CHANGED. Medicine cabinets are always a high-demand project during cold and flu season – and this lucky family was just weeks ahead of the quarantine lockdown... before all the toilet paper, water, and cold medicine was cleared from the shelves (whoever is hoarding baby wipes, please stop. There's babies that actually need those).
I had many requests to transfer the makeover to a blog post... so here it is! And hopefully this can be a fun project to provide a sense of structure (and 30 minutes of productive distraction) in a time of unknowns.
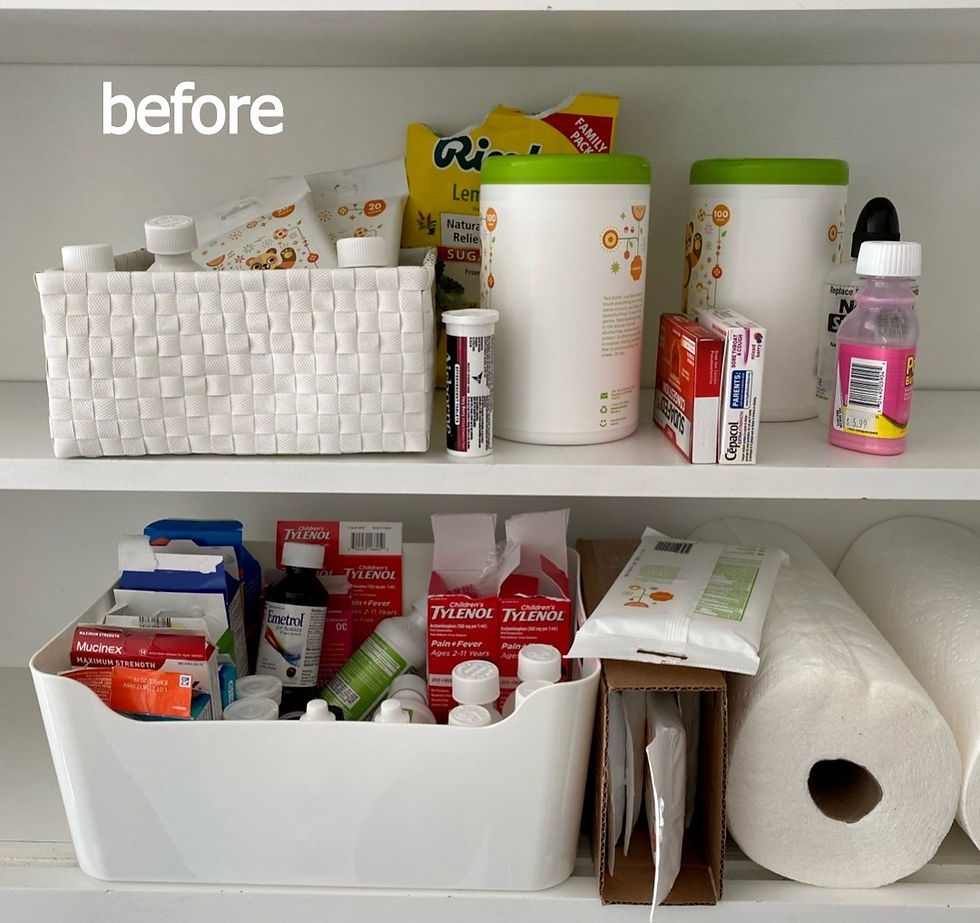
1: Take It All Out
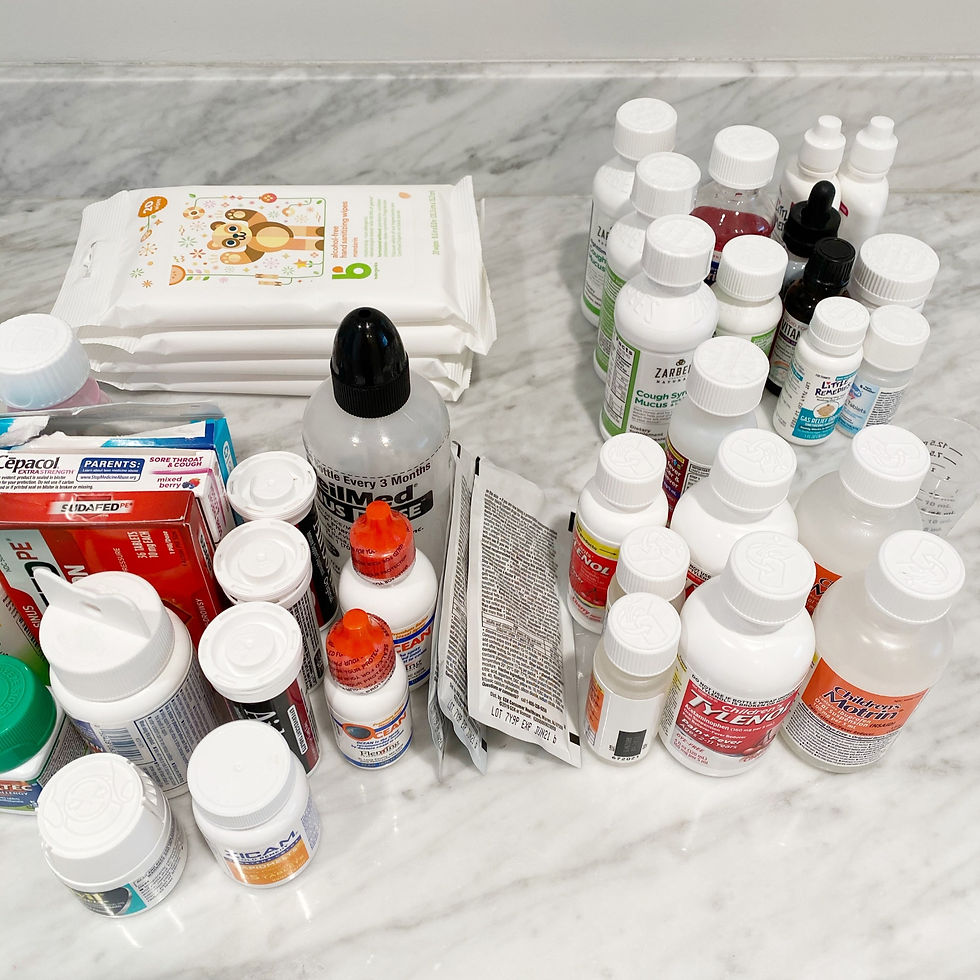
Find a nice big surface – whether that's the bathroom counter, the floor, or a table – and lay out ALL the products in your medicine cabinet.

2. Remove Unnecessary Packaging
Take out bottles from their cardboard boxes, and take off any half-removed plastic seals. Make sure to properly recycle the packaging – know which types of plastics your local recycling company accepts, and recycle all cardboard. You'll save so much space from eliminating bulky packaging – weather that's bottle boxes, pill packaging, or cough drop bags.
Exception: Do not remove from packaging if the expiration date or instructions aren't on the product.
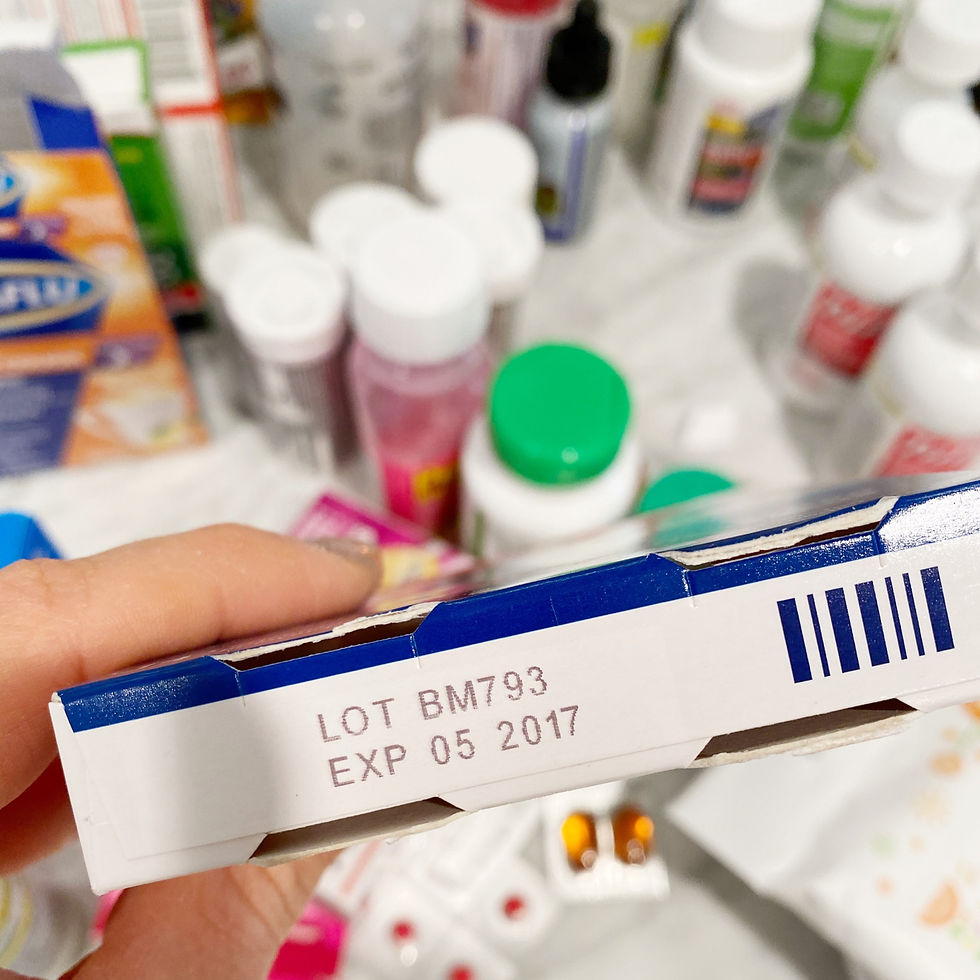
3. Check Expiration Dates
This part is always so fascinating - and funny. Gotta love a bottle of Pepto from 2001. Discard any expired items SAFELY. The ideal way to do this is by participating in a safe drug disposal program – either a drug take-back day, a drug mail-back program, or a local pharmacy.
Make sure to not throw out expired products directly into your garbage can, especially if you have little ones or animals.
4. Clean
Wipe down the shelves, de-goop the bottom of bottles, and make sure any containers you'll be using are nice and clean. Don't skip this step – there's nothing worse than doing all this hard work to just put sticky items into nice new or cleaned containers.
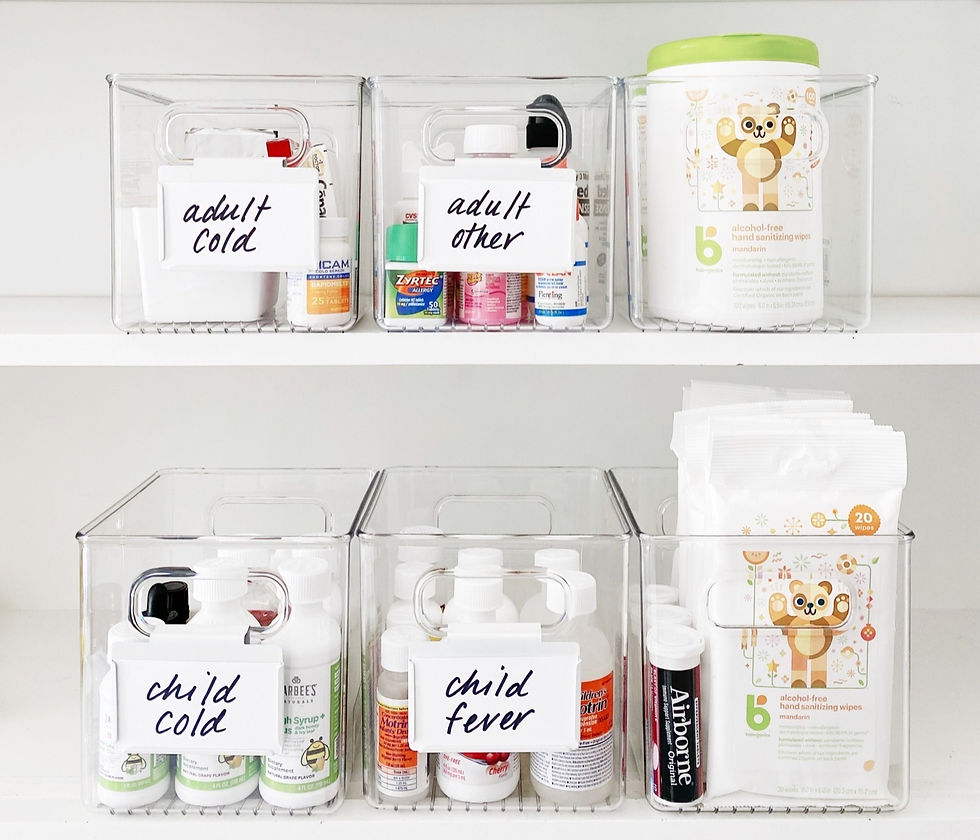
5. Sort Into Categories
This step will make late night retrieval so much easier – and so important to keep adult vs. children's medicines clearly separated. For families with kids this is how I sort:
Kids cold and flu (I usually put any allergy medicine here)
Kids fever and pain (this also includes teething, stomach, etc)
Adult cold and flu (sinus, nasal spray, etc)
Adult fever and pain (stomach, digestion)
6. Contain & Label
I love clear containers for a medicine cabinet since they are easy to see and easy to wipe clean, but you can use whatever you like, or already have. Whatever you choose, just make sure they are easy to pull from, and easy to clean in case there's a cold syrup spill or a cough drop sits at the bottom... our beloved seagrass bins won't be fun to clean in that case.
Place the most used items towards the front of each container. Depending on your medicine cabinet setup, store the adult medicine higher, or further back. Always make sure it's out of reach from little children, and make sure all bottles are properly secure. Even the "harmless" kids medicine. I learned this the hard way with my first kiddo... at age 2, she climbed all the way up on the counter and reached the highest shelf to get those yummy little melatonin pills. She devoured more than half the bottle. PSA – it takes 60 mg of melatonin to poison a child under 30 pounds. Luckily only 30 mg come in each bottle. GAH. Yes, we checked on her every hour, yes she slept very well, and yes, we now have the poison control line on speed dial.
Last, clearly label each bin. Sometimes I laugh to myself when I'm labeling a container of crayons or colored pencils... like good thing I'm labeling these because it's not obvious at all what's in here :) But labels are fun, and in this case VERY important. You want to make it completely fool proof – so if your husband, father-in-law, or babysitter need to find the kid's medicine, it's easy and quick. If you're using clear bins, you can use a white chalk marker directly on the bin, but I like using a label clip so that it's even easier to see. And write it nice and big – or print up labels off your computer.
Bonus Tips:
Store syringes, medicine cups, and thermometers in their own smaller containers within the larger bin so they stay clean and don't get mixed up in the bottom of the bins. And always make sure to label the type of thermometer ;) Don't want to get those confused!
Contain cough drops within their own small bins – this eliminates the noisy crinkling bag – especially in the middle of the night which is basically when everyone's throats start tickling. If you have little kids, I swear that crinkling cough drop bag wakes them up no matter how asleep they are.
Find all products used here.


Comments